
This topic is applicable to Sonos owners only.
The Raspberry Pi was introduced in a previous topic, covering how it enhances AlbumPlays, what you need to get, and how to install it.
The aim of this step is to the ease support and installation of AlbumPlays, and to allow AlbumPlays to access your NAS (if you have one), and to install an AlbumPlays prerequistite.
- Allow Windows Explorer to access files on your RPi
- [optional] Create a share on your NAS, accessible from both Linux (Rpi) and Windows
- Install Synaptic (a graphical package manager)
- Install CherryPy (an AlbumPlays SPY mode prerequisite)
1. Allow Windows Explorer to access files on your RPi
Install, support & upgrades of AlbumPlays are each simplified if you can access and update Raspberry Pi files and folders using Windows Explorer on your PC.
- log into the RPi using the TightVNC Viewer on your PC
- create a new folder, inside your home directory, for easy-access sharing with Windows
- click on the FileManager icon (filing cabinet icon; see #1 in illustration below)
- navigate to the home directory (/home/pi) … the FileManager should be pre-positioned there by default, if not you can navigate there quickly via a click on the brown home folder folder icon (#2 in illustration below)
- from here, it is just the same as creating a folder in Windows:
- right click anywhere in blank space, in the FileManager’s right hand white panel, to open the pop-up menu shown as #3 below
- select Create New and then Folder
- Give the folder a meaningful name (no embedded blanks) …. I named my folder share, as will be seen in a later step of this procedure

- Open a terminal session on the RPi .. (black folder icon)
-
Install Windows connectivity software onto the RPi
copy (or type) the following into the terminal session, pressing the Enter key at the endsudo apt-get install samba samba-common-bin -
Share the folder that you just created
Continuing in the terminal session: copy (or type) the following, pressing the Enter key at the endsudo nano /etc/samba/smb.conf- Linux’s nano editor will open.
- move the cursor to the bottom of the document using the down arrow keys (mouse clicks don’t work in Nano).
-
copy (or type) the following (substitute your folder name into the line path=/home/pi/share if you named your folder something other than share)
### Added for AlbumPlays [PiShare] comment=Raspberry Pi Share path=/home/pi/share browseable=Yes writeable=Yes only guest=no create mask=0777 directory mask=0777 public=no -
nb: PiShare will become the Windows name for the shared folder … ie. RPi’s /home/pi/share folder will be seen as \\RASPBERRYPI\PiShare in Windows.
- exit nano via Ctrl+x keys
- confirm that you want to save your changes, by pressing y when asked.
- then press Enter to confirm overwrite of the existing file.
-
Give your pi password to cross platform services
Copy (or type) the following command into the RPi terminal session, and then press Entersudo smbpasswd -a piYou will then be required to enter your password (raspberry) twice, for verification
-
Test
- go to Windows on your PC, and open Network
- open RASPBERRYPI
- you will need to provide credentials; username = pi, password = raspberry
- there should be two network folders: PiShare is the easy-access directory that you created on the RPi, and is useful for transferring items to|from the RPi. There will also network folder named pi, which will be your home directory on the Rpi (this is where we will install AlbumPlays in a later step)

- Open PiShare, and create a text document in there using the Windows Explorer (right click, New|TextDocument)
- open the file, and type in some phrase, then save and close it
- go to your RPi desktop, and verify that the file is accessible from RPi … open the file (double click) … modify and save the contents .. close the file
- go back to Windows, reopen the file, and verify that you are seeing the modified contents


If you don’t see the RPi in the Network display, check your PC’s workgroup name:
– in Windows, right click on Computer (aka My Computer)
– select Properties
– check your workgroup name, as illustrated below
– 
– if the name is something other than workgroup, you need to make a further change to the smb.conf configuration file
– open a terminal session on the RPi
– type, pressing Enter at the end
sudo nano /etc/samba/smb.conf
– carefully move the cursor down until you find the section headed up by [global] …. it is towards the top of the file, about 1 page down
– look in that section for the line starting with workgroup = … it is probably
workgroup = workgroup
– change the right hand side to reflect your own workgroup name
– press Ctrl+x
– type y to save your changes
– and press enter to overwrite
– reboot the RPi, and repeat the above test
collapse
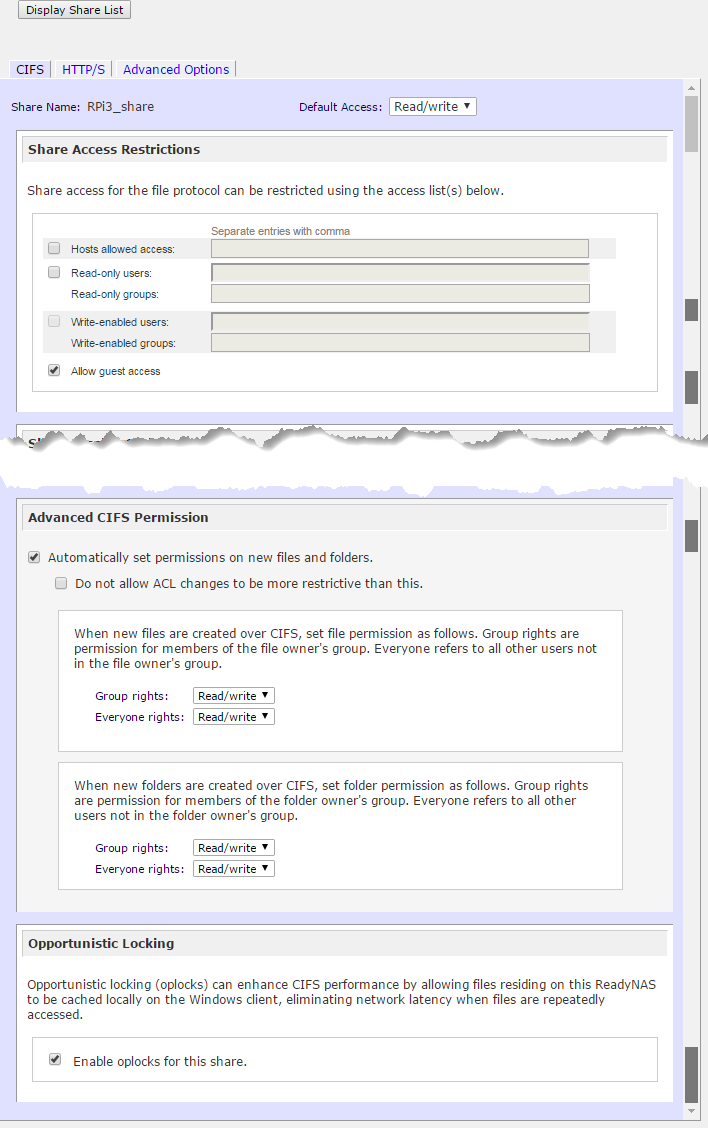
2. [If you have a NAS] – Create a share on your NAS, accessible from both Linux (RPi) and Windows
If you are using the database transfer option to make Spy track play observations available to the main AlbumPlays module, it is best that the RPi be able to store them to some other always-on device, such as a NAS.
3. Install Synaptic (a graphical package manager)
Up until now we have used the command line (sudo apt-get) to install software onto the RPi. A tool with a GUI makes it easier to browse & find what is available.
- log into the RPi using the TightVNC Viewer on your PC
- Open a terminal session on the RPi .. (black folder icon)
-
copy, or type the following commands into the terminal session; one line at a time. pressing Enter at the end of each line
-
the 1st line updates the RPi’s view of the most current versions and dependencies for available software, and the 2nd line installs Synaptic
sudo apt-get update
sudo apt-get install synaptic
-
collapse
4. Install CherryPy (a prerequisite for AlbumPlays SPY mode
AlbumPlays’ Observe & Detect module uses CherryPy to create the menu which enables you to control and observe the O&D module from your PC.
This step uses Synaptic, which we installed in step #3 above
- press the Menu button (raspberry pi icon), and select Preferences
- open Synaptic with the option Synaptic Package Manager
- login: User pi, password raspberry
- read and close the small tutorial pop-up window
- press the Reload button, this will update Synaptic’s view of the latest version and fixes to all available software.

- press the button alongside, its name is Mark All Upgrades
This will respond by listing any of your installed packages which have an new or fixed version.- press Mark to specify that all upgrades should be installed
- press the search button (magnifying glass icon), and type CherryPy

- check python-cherrypy3 from the list, and select mark for installation from the menu which pops up
nb: take care not to select python3-cherrypy3 … we are running Python2, not python3

- press the Apply button
Review the list of items which will be installed, the disk space required, and the size of the Internet download which will be required … your download size may be different to that illustrated below, as it will depend upon what updates are available for you

- Press this new Apply button
- It takes a while.
There is no visible change to the desktop as CherryPy is an under-the-covers thing.


collapse
Next step: Install AlbumPlays’ Spy Observe & Detect module onto your RPi – coming soon
Previous step: Configuring your Raspberry Pi
Site map: Index to my Raspberry Pi installation & support pages