This topic is applicable to Sonos owners only.
This, and the following pages, cover the assisted install option for your Raspberry Pi. … Alternatively, there is a manual install option; described here.
To complete this task you will need the items listed here
You will also need to have installed the PC components, as described here.
Download PiBakery
PiBakery is a free tool which can automatically customise your Raspberry Pi. I have created a PiBakery script which will:
- attach the RPi to your home network
- configure your RPi, so that it may be observed and controlled from your PC, and so that you can read and write RPi folders using the Windows Explorer
- install AlbumPlays prerequisites, and generally setup the environment ready for AlbumPlays
Download the PiBakery installer, onto your PC, from here, and follow the instructions on that page
This is a large download, as it contains the whole Linux Operating system, needed by the Raspberry Pi. The download is approximately 1.2gb.
The download may be avoided by choosing the manual install option, as that uses a SD card which is preloaded with the RPi operating software, however quite a lot of configuration is required.
Use PiBakery to create the RPi’s disk image
The Raspberry Pi stores its operating system, files and programs onto the small SD card. PiBakery will create that disk image for you.
Insert your SD card into your PC SD card reader attachment. If the reader doesn’t have a slot small enough for the micro SD card, you will need to use the card’s adapter sleave.
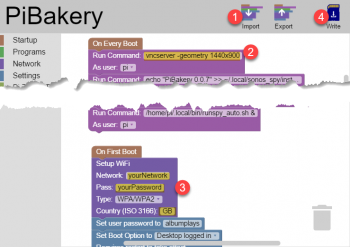
- Open PiBakery, press the Import button, and load my PiBakery script file (it was amongst the prerequisite items referred to above, its name is albumplays-#.#.#.xml, where the #’s are the version number).
- Provide resolution dimensions suitable for your PC screen (find this via a right click on a blank space on your PC desktop, and then take option DisplaySettings … is a good idea to set the RPI one step smaller, to leave space for your Windows task bar)
- Type your WiFi network ID (aka SSID), password, and two character Country Code into the PiBakery script, as shown below .. take care not unhook the logic blocks … they are clicked together like a tower of Lego blocks … if you detach one, drag it back into position, so that the chain clicks back together again
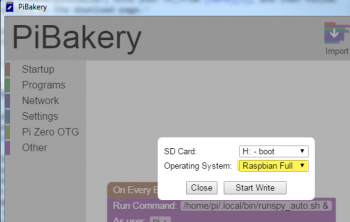
- Press PiBakery’s Write button to create the disk image onto the SD card .. take option Raspbian Full for Opearting System
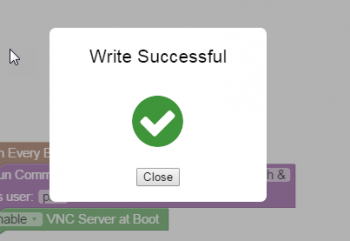
PiBakery will alert you when the SD card is loaded, as shown below. Press close, then remove the SD card.
Boot the Raspberry Pi
- insert the SD card into the Raspberry Pi; see this YouTube demo for location of the correct slot
- power up the Raspberry Pi, and allow some time for PiBakery to complete configuration … it takes a while, as it needs to download a couple of option libraries across the Internet, and install them … you will be unable to complete the following steps until this step has completed, so if you have problems, wait a little longer then try again
- find out what IP Address your router has given to your Raspberry Pi … here are some techniques to achieve this
Log into the Raspberry Pi using your PC
- open VNC Viewer, which we installed here
- confirm that you want to use VNC Viewer, by accepting the security warning
- take the File|NewConnection menu option
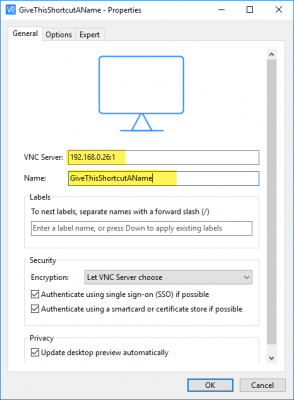
- enter the IP address to your RPi followed by :1 (no blank space between, see below)
- and provide a friendly name for the connection shortcut that you are creating, and press OK
- doubleclick on the shortcut that you created
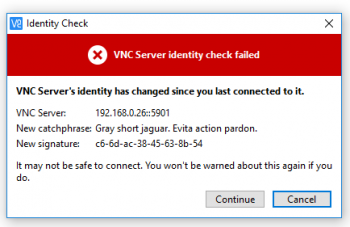
- as this is the first connection to your RPi configuration you may get an alarming looking warning message .. press Continue
- press Connect
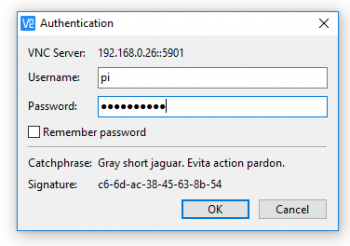
- provide your login credentials (Username: pi, and Password: albumplays), press OK
-
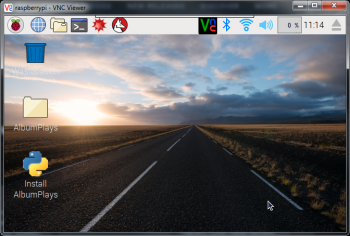
the RPi desktop should be displayed, looking something like this
-
nb: the desktop may contain just one icon (the “Wastebasket”) this first time through. …If so press the top left raspberry icon … select the “Reboot” option within “Shutdown” … after you log back in, you should see all three icons on the desktop
Next step: Install AlbumPlays onto the Raspberry Pi
Site map: Index to my Raspberry Pi installation & support pages
