This topic is applicable to Sonos owners only.
The Raspberry Pi was introduced in a previous topic ; how it enhances AlbumPlays, what you need to get, and how to install it.
The aim of this step is to remove any need to have a screen, keyboard, or mouse for your Rpi. We will enable your Windows PC to access the RPi’s Windows-like desktop, as this is the easiest way to control the RPi for those of us without a deep Linux background.
1. Install a remote access server onto your RPi.
-
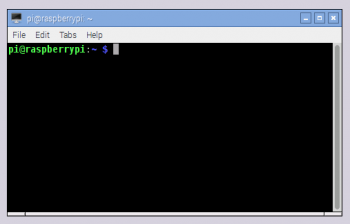
Open a Linux Terminal session on the RPi
Clicking on the black screen icon indicated by #3 in the above diagram -
Install the remote control s/w onto the RPi
- type in the Linux commands listed below, into the black window, pressing the Enter key at the end of each line to allow it to process
- the first line ensures that you will be using the most current version of the remote control software
- the 2nd line installs that software
- and the last line initialises the remote control server, requiring you to set an ongoing access password, and optional read-only view password. … Be sure to remember the first password that you assign, as you will need to enter this each time that you sign into the RPi desktop from your Windows PC.
-
Important Unlike Windows, Linux commands and file name are case sensitive, so follow capitalisation carefully
sudo apt-get update && sudo apt-get upgrade sudo apt-get install tightvncserver tightvncserver -
if you need further information regarding this step, the official Raspberry Pi tutorial is here, and here is a good tutorial from a Windows perspective.
- type in the Linux commands listed below, into the black window, pressing the Enter key at the end of each line to allow it to process
3. Reboot the RPi
* close the terminal session window
* then Press the top left Menu button (the one with a raspberry icon)
* select Shutdown, with the option Reboot. If a password is required it is raspberry.
* Once the RPi has rebooted ensure that you still have Internet access using the RPi’s browse (#2 in the diagram at the top of this section).
5. Discover the RPi’s IP address on your home network
Re-open the terminal window and type in the following line (remember capitalisation is important)
     hostname -I

* write down the IP address
* further assistance is [here][23] if you have difficulty
4. Restart the RPi’s remote control server
* type the following line into the terminal session window to restart the remore access server (we will reconfigure this to autostart in a later step)

        tightvncserver
collapse
This path requires the putty program which you [previously installed][26] on your PC
We have to start by using RPi’s DOS-like command line, as we cannot yet get to its graphical Windows-like desktop.
-
Discover the RPi’s IP address
You need to discover the IP address which your home network has assigned to the RPi. Their website lists several strategies to achieve this. -
Sign into the RPi using Putty on the PC
- open the putty.exe file that you saved onto your PC in a previous step
- agree to the security warning if asked
- type in the RPi’s IP address as shown below, verify that the other two marked entries are as shown, then press open
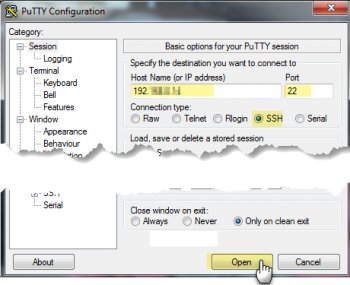
- the RPi should respond as follows; the RPi’s login name is pi and the password is raspberry …. nb: Linux echos back nothing as you enter passwords, ie. it doesn’t echo back with *’s as Windows does
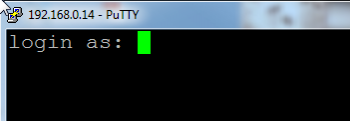
- the expected response is shown below; showing that you are connected to the RPi, and logged on as user pi

-
Install the remote control s/w onto the RPi
- type in the Linux commands listed below, pressing the Enter key at the end of each line, to allow it to process
- the first line ensures that you will be using the most current version of the remote control software
- the 2nd line installs that software
- and the last line starts the remote control server, which will then require you to set an ongoing access password, and optional read-only view password. … Be sure to remember the first password you assign, as you will need to enter this each time that you sign into the RPi desktop from your Windows PC.
-
Important Unlike Windows, Linux commands and file names are case sensitive, so follow capitalisation carefully
sudo apt-get update && sudo apt-get upgrade sudo apt-get install tightvncserver tightvncserver -
if you need further information regarding this step, the official Raspberry Pi tutorial is here, and here is a good tutorial from a Windows perspective.
- type in the Linux commands listed below, pressing the Enter key at the end of each line, to allow it to process
-
Reboot the RPi
-
type the following line to trigger a reboot
sudo reboot -
then close putty, and wait a few moments for the reboot to complete
-
-
Log in again using putty on your PC
Restart the RPi’s remote control server-
type the following line into the terminal session window to restart the remore access server (we will reconfigure the RPi to autostart this in a later step)
tightvncserver
-
collapse
2. Log into the RPi desktop from your PC.
This step requires the TightVNC program which you previously installed on your PC
This step also requires that the remote control server on your RPi is already running. At the moment we are manually starting it, but in a later stage in this tutorial I will show you how to configure it for auto-start.
The RPi must be running, with it’s remote control server started. It will be in this state if you are following on from the previous step in this tutorial. If the RPi has been restarted, you will need to restart Tightvncserver.
- on your PC open the putty.exe file that you saved in a [previous step][26]
- agree to the security warning if asked
- type in the RPi’s IP address as shown below, verify that the other two marked entries are as shown, then press open

- the RPi should respond as follows; the RPi’s login name is pi and the password is raspberry …. nb: Linux echos back nothing as you enter passwords, ie. it doesn’t echo back with *’s as Windows does

- the expected response is shown below; showing that you are connected to the RPi, and logged on as user pi

-
type the following Linux command to start the remote control server
tightvncserver
collapse
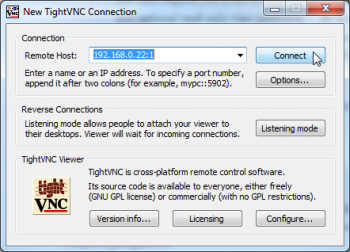
Open the TightVNC Viewer program on your PC, enter the your RPi’s IP address followed by :1 as illustrated in the following illustration, then press the enter key.
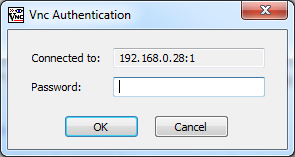
The RPi will answer with an authentication challenge. Type in the password that you set when you initialised the vnc server on the Rpi.
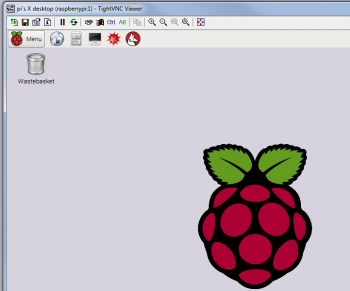
The RPi’s desktop will open in a window on your PC
- reboot the RPi (turn its power off|on)
- check that you can access the RPi via putty … did you get the IP address correct?
- restart the remote control server on the RPi
- try again from the TightVNC viewer on your PC
- did you receive the TightVNC challenge as shown above?
- if yes, are you using the same VNC access password that you setup on the RPi? … ie. it needs the one that you set, not raspberry which is the default login password to the RPi
collapse
Next step: Configuring the Raspberry Pi
Previous step: Raspberry Pi introduction
Site map: Index to my Raspberry Pi installation & support pages


